Anime Model Kits: Types, Assembly and Display Guide

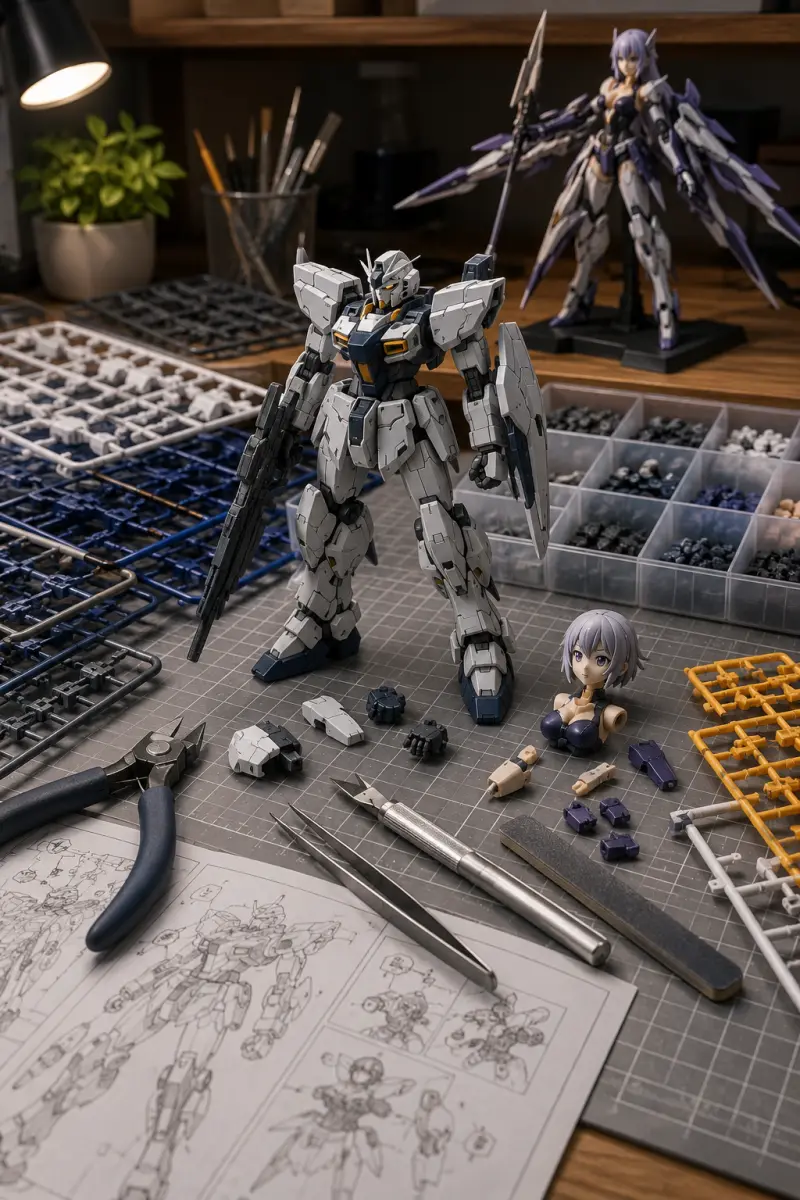
Anime model kits turn a finished character, vehicle or machine into a hands-on construction project. Instead of opening a box and placing a completed figure directly on a shelf, the builder identifies parts, removes them from runners, assembles joints and decides how far to take the final finish. As a result, the completed model carries both the identity of the original subject and the builder’s own choices.
This hands-on quality explains why Japanese model kits attract beginners as well as experienced collectors. A simple snap-fit kit may come together in one evening, while a more advanced project can involve seam removal, sanding, painting, panel lining, decals and repeated test fitting. Therefore, choosing a kit that matches the builder’s current skill level often makes the difference between an enjoyable project and a box that remains unfinished.
The most suitable kit is not automatically the one with the highest part count or the most elaborate finished photographs. Instead, buyers should compare construction method, scale, articulation, colour separation, tools, finishing requirements and available display space before ordering.
Model Kit, Action Figure or Statue?
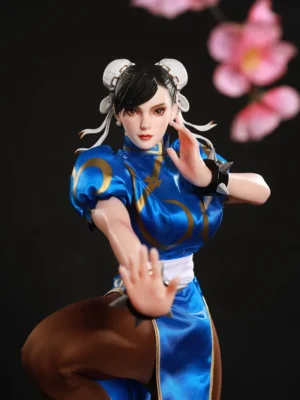
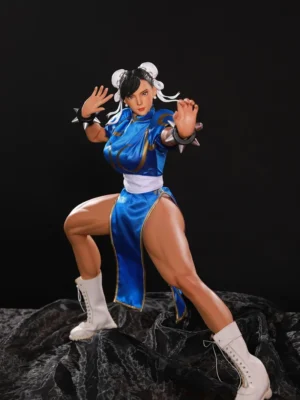
Model kits, action figures and statues can represent the same anime character or machine, but they offer very different collecting experiences. Understanding that difference helps prevent disappointment before the box is opened.
| Format | What the buyer receives | Type of involvement |
|---|---|---|
| Model kit | Parts on runners, instructions, stickers or decals | Assembly and optional finishing |
| Action figure | Completed articulated body with accessories | Posing and display |
| Statue | Completed fixed composition | Visual display with little adjustment |
A model kit gives the owner direct involvement in creating the final object. By contrast, an action figure arrives largely complete and focuses on posing, while a statue presents one finished composition from the beginning.
However, an anime model is not automatically articulated, and an articulated kit is not automatically intended for constant play. Small pegs, painted surfaces, thin antennae and delicate accessories often require careful collector handling even when the finished body includes movable joints.
Therefore, product age guidance, warnings and assembly instructions should be treated as practical information rather than packaging decoration.
Choose the Subject Before Comparing Complexity
A first model kit becomes easier to finish when the builder genuinely cares about the subject. The motivation to clean another gate mark or correct a misplaced decal is stronger when the finished model represents a favourite character, mobile suit, vehicle or scene.
Start by identifying the exact version. Anime characters can change costumes, hairstyles, weapons and expressions across different story arcs, while mecha designs may receive upgraded armour, alternative equipment or colour variations.
For that reason, compare the complete kit name rather than relying only on the character or series name. Two boxes may feature the same subject but produce noticeably different finished models.
Read the Box Before Buying
The front artwork shows the intended result, but the side and back panels often reveal more useful information. Look for finished dimensions, articulation examples, runner photographs, accessories and whether the promotional model uses additional paint.
In addition, check whether the box identifies the kit as snap-fit, pre-coloured or requiring glue. Some promotional photographs show professionally painted examples that look very different from a straight build.
Therefore, buyers should determine what the unpainted plastic actually provides before judging the expected result.
Read the Runner Layout Before Judging Difficulty
Part count alone does not define complexity. Large colour-separated armour pieces can be straightforward, while a smaller kit with delicate hinges, tiny facial components or waterslide decals may demand much more control.
Before beginning, identify the runners and compare their letters with the instruction sheet. This makes it easier to locate parts without repeatedly searching through the entire box.
Next, check whether the kit contains duplicated runners, optional components or parts that remain unused for a particular version. These extra pieces are not necessarily missing instructions; they may come from a shared mould.
Understanding the runner layout early reduces mistakes later in the build.
Snap-Fit Does Not Mean Tool-Free
Many modern anime model kits use snap-fit construction, which means the main pieces connect without adhesive. However, the parts still need to be removed cleanly from their runners.
Twisting parts free by hand can leave stress marks or damage thin details. Therefore, even a beginner-friendly snap-fit kit benefits from a suitable pair of nippers.
Some kits may also use stickers, decals or optional glued parts. As a result, “no glue required” should not be interpreted as “no preparation required.”
Check Whether Glue Is Required
Older kits and some specialised designs still use adhesive for important sections. Meanwhile, even a snap-fit model may contain optional decorations or small components that builders choose to secure with glue.
Before purchasing adhesive, identify the plastic type and follow the product instructions. Different glues behave differently, and excessive adhesive can damage surrounding detail.
For a first project, a fully snap-fit design usually keeps the assembly process more manageable.
Character Kits and Mechanical Kits Create Different Challenges
Character kits place strong visual emphasis on the face, hair and skin-coloured surfaces. Therefore, small alignment errors around the eyes or hairline can become more noticeable than a minor flaw elsewhere on the body.
Mechanical kits distribute attention across armour, joints, weapons and panel lines. In those builds, gate cleanup and structural alignment may matter more across a larger number of visible surfaces.
Neither type is inherently harder. Instead, they demand attention in different areas.
The Face Deserves Extra Care on Character Kits
The face usually becomes the first area viewers notice. If the eyes sit too high, a decal tilts slightly or the hair seam remains obvious, the finished character may feel less convincing even when the rest of the build looks clean.
Pre-printed face parts simplify this stage, while blank faces with decals require more precision. Therefore, beginners who want a character kit should check how the manufacturer handles the eyes before purchasing.
When applying face decals, work slowly and compare both eyes before final placement. A small difference in angle can change the expression significantly.
Hair Parts Need Clean Alignment
Anime hairstyles often use multiple pointed pieces that overlap around the head. As a result, incorrect orientation can create visible gaps or an uneven silhouette.
Test-fit the front, side and rear hair sections before pressing the pegs fully together. In addition, clean gate marks carefully because many runners attach directly to visible hair edges.
Long hair may also limit neck or shoulder movement after assembly, so articulation should be checked gently rather than forced.
Mechanical Kits Reward Careful Gate Cleanup
Mechanical armour panels often use flat surfaces where gate marks remain easy to see. Therefore, cutting the part directly against the surface in one heavy movement can create an obvious white stress mark.
A two-stage cut offers more control. First, remove the part while leaving a small amount of runner attached. Then trim the remaining gate gradually.
Sanding or careful knife work can refine the surface further when necessary.
Tools That Improve the First Build
- Single-blade or fine hobby nippers: make the first cut away from the part and a second controlled cut near the surface.
- Hobby knife or sanding tools: refine remaining gate marks while protecting the finished surface.
- Parts tray: prevents tiny components from disappearing during assembly.
- Tweezers: help position small stickers and decals without repeatedly touching the adhesive.
- Soft cloth and good lighting: reveal stress marks and protect completed sections.
Power tools are unnecessary for most first builds. In fact, controlled removal usually protects small details better than speed.
If paint, solvent or adhesive enters the project, follow the product label, ventilate the workspace and keep the materials away from children and ignition sources.
Why Good Nippers Matter
Nippers control the first contact between the builder and almost every part in the kit. A poor cut can crush the plastic, leave a large stress mark or damage a delicate connection point.
However, expensive professional tools are not essential for a first build. A clean, sharp hobby nipper used carefully can produce good results.
The technique matters as much as the tool. Avoid cutting large gates flush against a visible surface in one movement when a two-stage cut gives more control.
Use a Hobby Knife Carefully
A hobby knife can remove small remaining gate marks that nippers cannot reach cleanly. Nevertheless, it introduces a sharp blade into the workspace and requires deliberate control.
Always cut away from the hand and avoid trying to remove too much plastic in one pass. Several light cuts usually provide more precision than one deep cut.
When the plastic is already close to the desired shape, sanding may offer a safer finishing option.
Sanding Helps Correct Gate Marks
Sanding sticks, sponges or fine abrasive tools can gradually level a gate mark with the surrounding surface. Different grits remove different amounts of material, so beginners should avoid starting too aggressively on visible parts.
Curved surfaces also need care because flat sanding tools can unintentionally flatten the original sculpt.
Therefore, work gradually and inspect the surface under good light before removing more material.
Organise the Workspace Before Cutting
Workspace organisation improves accuracy almost as much as better tools. Use one tray for loose unfinished parts and another for completed sections.
Keep drinks away from instructions, stickers and decals. A white cloth or light-coloured mat beneath the work area can also make dark, transparent or tiny pieces easier to find.
In addition, keep only the runners needed for the current step on the desk. Returning unused runners to the box reduces clutter and the chance of knocking parts onto the floor.
Good Lighting Prevents Small Mistakes
Weak lighting makes gate marks, seam alignment and tiny part numbers harder to see. Therefore, a bright work lamp can improve the build without changing any tools.
Neutral lighting also makes colour differences easier to judge when painting or selecting decals.
However, avoid placing a very hot lamp directly beside the kit or solvents.
Stop When Concentration Drops
Many mistakes occur near the end of a long build when the builder becomes tired and begins rushing. Reversed joints, damaged antennae and lost parts often happen during these final steps.
Therefore, stopping for the day can be more productive than forcing the model to completion.
A model kit does not need to be finished in one session. Breaking the project into smaller stages usually produces cleaner work and a more enjoyable experience.
A Reliable Assembly Sequence
- Inventory the runners, decals and accessories against the instruction sheet.
- Identify optional parts and unused runner pieces before beginning.
- Build one small section at a time and return unneeded runners to the box.
- Cut each part with a short gate remaining, then trim the remainder carefully.
- Check the part number and orientation before joining pieces.
- Test-fit components before pressing pegs fully home.
- Move completed joints through a small range to confirm orientation.
- Apply stickers, decals, panel lining or paint only after cleaning the surrounding surface.
- Allow paint and coatings to cure before final assembly or posing.
- Store unused hands, weapons and optional parts in a labelled container.
Inventory the Kit Before Assembly
Before making the first cut, compare the runners and accessories with the instruction sheet. This step helps identify missing or damaged pieces before the project becomes difficult to return or replace.
Decal sheets and very small clear parts deserve particular attention because they can remain hidden beneath packaging material.
Once the inventory is complete, keep the instruction manual nearby throughout the build.
Build in Small Sections
Most instruction manuals divide the model into logical sections such as head, torso, arms and legs. Following that sequence keeps the workspace manageable.
Completing one section before opening several others also reduces the number of loose parts on the table.
However, builders planning extensive painting may deliberately change the sequence. In that case, test fitting becomes even more important.
Test Fit Before Pressing Pegs Fully Together
A tight snap-fit connection can become difficult to separate once fully assembled. Therefore, check orientation before applying strong pressure.
Make sure left and right parts match the instructions and confirm that internal joints face the correct direction.
This habit becomes especially valuable when a part must be painted, sanded or adjusted before final closure.
Do Not Force a Joint That Feels Wrong
A correctly assembled joint should move within its intended range without requiring extreme force. If movement feels unusually difficult, stop and inspect the orientation.
Paint, excess plastic or an incorrectly seated component can interfere with movement. Forcing the joint may damage the peg rather than solving the problem.
Therefore, test articulation gradually as each section comes together.
Understand Stickers and Decals Before Applying Them
Not every marking sheet works in the same way. Ordinary stickers use adhesive backing, while waterslide decals need water and careful positioning.
Some kits may also include dry-transfer markings or several types on one sheet. Therefore, identify the marking system before removing anything.
Small decals around faces and curved surfaces often require the most patience.
Sticker Placement Benefits From Tweezers
Fingers can block the view of a very small sticker and transfer oil onto the adhesive. Tweezers provide more control when positioning tiny markings.
However, sharp metal tips can scratch surrounding plastic. Use light pressure and avoid dragging the tool across painted surfaces.
Waterslide Decals Require More Preparation
Waterslide decals offer thin, detailed markings but demand more time than ordinary stickers. The builder normally loosens each decal in water before sliding it into position.
Excess movement can tear a delicate marking, while too little adjustment can leave it misaligned. Therefore, work with one small section at a time.
Allow the decals to dry fully before applying additional coatings or handling the surface extensively.
Straight Builds Can Still Look Excellent
A straight build uses the colour separation and moulded detail supplied by the manufacturer without extensive painting. Modern kits can produce strong results this way.
Therefore, beginners should not feel that every model needs professional painting to deserve display.
Clean gate removal, correct assembly and careful sticker placement can improve a straight build significantly without adding complicated finishing stages.
Panel Lining Adds Definition
Panel lining places darker colour into recessed mechanical details and can make armour sections easier to read visually.
This technique suits many mechanical kits, although the exact product needs to match the plastic and finish being used.
Too much lining can overwhelm subtle details. Therefore, builders should begin with selected recesses rather than covering every surface automatically.
Partial Painting Can Correct Small Details
A kit may separate most major colours through different plastic parts while leaving several small details as stickers or unpainted areas.
Partial painting lets the builder improve those specific sections without repainting the entire model.
For example, small costume details, buttons, weapon sections or armour markings may benefit from careful brush work.
This approach provides a useful bridge between a straight build and full painting.
Full Painting Changes the Entire Project
A complete repaint gives the builder control over colour, shading, texture and gloss. However, it also introduces surface preparation, masking, drying time and compatibility concerns.
Moving joints deserve special attention because paint layers can rub where parts contact one another.
Therefore, test fitting before painting helps reveal friction points that may need extra clearance.
Masking Protects Colour Boundaries
Masking allows the builder to paint one section while protecting another. Clean edges can make mechanical armour and costume details look much more precise.
However, paint should cure sufficiently before tape touches the surface. Removing masking too aggressively can lift a fresh coating.
Test pieces are valuable when trying an unfamiliar paint and masking combination.
Finishing Changes the Character of the Model
A straight build preserves the clean colour separation designed into the kit. Panel lining adds contrast to recessed detail, while partial painting can correct smaller colour areas.
A complete painted finish gives the builder greater control over shading, texture and surface gloss. However, every additional finishing stage increases the time and risk involved.
Therefore, builders should choose finishing techniques because they improve the desired result rather than because every advanced technique feels mandatory.
Matte, Satin and Gloss Finishes Create Different Effects
Surface finish changes how light interacts with the completed model. Matte coatings reduce reflections and can create a more painted appearance, while gloss emphasises smooth surfaces and metallic colours.
Satin sits between the two and can provide a softer sheen.
Character skin, clothing and mechanical armour do not necessarily need the same finish. Therefore, advanced builders may use different surface treatments across one model.
Character Kits Need Extra Attention Around Skin Surfaces
Skin-coloured plastic tends to show scratches, sanding differences and paint marks clearly. Therefore, gate cleanup around faces, arms and legs should remain controlled.
When sanding, avoid creating a flat patch that catches the light differently from the surrounding sculpt.
Likewise, test any paint or coating before applying it to a large visible skin area.
Mechanical Kits Emphasise Alignment
Mecha and armour-heavy designs often use many layered panels. Small alignment errors can therefore accumulate across the finished body.
Check that armour sits evenly on both sides before moving to the next section. In addition, confirm that weapons and backpack components connect securely without forcing the central body out of balance.
Scale and Finished Footprint Matter
Model scale should be considered alongside the final pose rather than in isolation. A seated character can occupy more shelf depth than a taller standing model.
Likewise, swords, wings, rifles, flowing hair or effect parts can extend well beyond the central body.
Therefore, measure the complete displayed outline shown in product photographs or instructions before choosing a kit for a confined space.
Non-Scale Kits Need Actual Measurements
Some anime model kits do not follow a mathematical scale ratio. In that case, labels such as “large” or “mini” provide only a rough impression.
Actual height, width and depth become much more useful for planning the display.
Always include the base and accessories when comparing those dimensions with the available cabinet.
Articulation Can Increase the Display Footprint
A compact neutral pose may fit easily inside a cabinet, while the same model with raised weapons and extended arms can require much more space.
Therefore, plan around the pose you actually want to display rather than the smallest possible configuration.
Leave additional clearance so accessories do not touch the cabinet walls or neighbouring models.
Display the Finished Model on a Stable Base
Once assembly is complete, support the model on a stable surface. Dynamic poses can place continuous leverage on one ankle, hip or narrow connection point.
An action base can distribute that load more effectively, especially when the model uses airborne or highly extended poses.
Therefore, stability should take priority over hiding every support component.
Keep Spare Parts Organised
Most kits include optional hands, weapons, face parts or leftover pieces. These components become easy to lose once the original runners disappear.
Store them in labelled bags or divided containers and include the kit name. In addition, keep unused decals and small adapters with the same group.
This simple system makes future pose changes and repairs much easier.
Keep the Instruction Manual
The manual remains useful after assembly because it identifies parts, connections and optional configurations.
Therefore, keep it with the spare accessories rather than discarding it after the model reaches the shelf.
A digital photograph or scan can also provide a backup for frequently referenced pages.
Light and Heat Affect Long-Term Display
Direct sunlight can fade colour, while excessive heat can encourage deformation in some plastic components. Therefore, avoid permanent display beside strong windows or concentrated heat sources.
The Canadian Conservation Institute explains that plastics deteriorate at different rates, so careful storage and environmental control can reduce avoidable change.
Dust control also helps preserve the finished appearance, particularly on models with matte surfaces or detailed panel lines.
Dust the Model Without Stressing Small Parts
Thin antennae, hair pieces and weapon tips can break when cleaning becomes too aggressive. Use a soft brush or another material-appropriate method.
Support fragile areas with the other hand when necessary. In addition, remove large detachable weapons before cleaning if doing so makes the model easier to handle safely.
When a Model Begins to Lean
Long-term leaning may come from loose joints, an unstable pose or excessive weight from accessories. Therefore, correct the cause rather than simply pushing the model upright repeatedly.
Reposition the feet, add the intended stand or reduce the leverage from heavy equipment.
If a structural part appears damaged, avoid forcing it further.
Buying Anime Model Kits Online
Online listings should identify the exact kit, manufacturer, scale or dimensions and box contents. Clear photographs also help buyers confirm that the listing matches the intended version.
Be cautious when a seller uses images from several releases on one page without explaining which product ships.
In addition, check whether the box is new, opened or previously started when purchasing second-hand.
Check for Missing Parts on Second-Hand Kits
A partially assembled model kit can offer good value, but missing parts may be difficult to replace. Therefore, ask for photographs of every runner, decal sheet and completed section.
Check whether the previous owner already cut pieces from the runners and whether those loose parts remain included.
Painted or glued sections also deserve inspection because they may be harder to disassemble or modify later.
Box Damage Does Not Always Mean Kit Damage
A crushed corner on the outer box may leave the runners completely unaffected. Conversely, an apparently clean box can still contain warped or missing parts.
Therefore, buyers interested in building should prioritise the condition and completeness of the contents.
Collectors who value sealed packaging may treat the box as part of the product, but that remains a separate consideration.
Choose a First Anime Model Kit You Can Finish
A beginner project should create enough challenge to stay interesting without requiring several unfamiliar techniques at once.
A snap-fit, colour-separated kit with clear instructions and manageable part size often provides a strong starting point.
After completing that build, the collector can add panel lining, painting, decals or more complicated articulation on later projects.
Progress usually feels more rewarding when each new kit introduces one or two additional skills rather than every advanced technique at once.
Anime Model Kit Buying Checklist
- Identify the exact character, machine and story version.
- Confirm whether the kit is snap-fit or requires glue.
- Check whether the promotional model uses additional paint.
- Review the runner layout and expected part size.
- Check whether the eyes are pre-printed, stickers or decals.
- Confirm the type of decals included.
- Identify the tools needed before assembly.
- Check whether painting is optional or necessary for important colours.
- Read the finished height, width and depth.
- Include weapons, hair, wings, effects and the base in the display footprint.
- Check articulation and support requirements.
- Plan stable, shaded display space.
- Keep spare parts, decals and instructions together after completion.
Anime Model Kits Within a Wider Collection
Model kits offer something completed figures cannot reproduce: the memory of building the object. Every cleaned gate, adjusted decal and finishing choice becomes part of the finished model.
However, not every collector wants the same level of involvement. Some prefer articulated figures that arrive ready for posing, while others value fixed statues or larger character designs that focus more heavily on visual presence.
The Anime Figures & Collectibles reference compares kits with statues, articulated figures and other collector formats.
Builders interested in a specific construction tradition can continue with the Gundam and Gunpla kit reference.
From Building to Character Collecting
Some collectors enjoy the labour of creating the object, while others become most attached to the character’s face, hairstyle, costume or fictional personality.
The LORIBEAR Anime Figures collection extends that character-focused interest into completed designs where the assembly stage is no longer the central experience.
Instead, collectors can focus more directly on character identity, body presentation, costume styling and the visual relationship between the product and the original anime or game design.
Frequently Asked Questions
Do anime model kits always need glue?
No. Many modern kits use snap-fit construction. However, buyers should still check the box and instructions because some older kits, optional accessories or specialised parts may require adhesive.
Should parts be painted before assembly?
It depends on the kit and the areas that need paint. Test fitting first helps reveal hidden surfaces, moving joints and sections that may become difficult to reach after final assembly.
What causes white marks near the gates?
Stress in the plastic can appear when a part is twisted from the runner or cut too close in one heavy movement. Therefore, a two-stage cut usually reduces the amount of stress transferred to the visible surface.
Do beginners need expensive model-building tools?
No. A suitable hobby nipper, basic cleanup tool, tweezers and good lighting are enough for many first builds. Better tools can improve convenience, but careful technique matters more than buying every specialised tool immediately.
Are anime model kits suitable for children?
Follow the stated age guidance. Small parts, sharp hobby tools, paints and adhesives can introduce risks beyond the finished model itself.
What is the difference between stickers and waterslide decals?
Stickers use adhesive backing and apply directly to the surface. Waterslide decals first loosen in water and then slide into position, which allows a thinner finish but requires more careful handling.
Should I paint my first anime model kit?
Not necessarily. A clean straight build can already look excellent when the kit provides good colour separation. Builders can add panel lining or small painted details later as their confidence increases.
How should spare parts be stored?
Keep them dry in labelled bags or divided boxes, away from direct sunlight and heat. Include the instruction sheet or a note identifying the exact kit so the parts remain useful later.
How should a finished model kit be displayed?
Use a stable surface or suitable support stand, leave enough clearance around weapons and fragile parts, and avoid prolonged direct sunlight or excessive heat.
Sources
- UK Office for Product Safety and Standards: buying products online safely
- Canadian Conservation Institute: plastics and modern materials
The Collector Guides connect model building with character, display and care topics.
Explore Anime-Inspired Character Dolls at LORIBEAR
For collectors who also value character identity, facial detail, body proportions and costume styling, the LORIBEAR shop offers anime-inspired sex dolls built around recognisable character presentation and detailed body design.
The current collection includes different characters, sizes and material configurations, including TPE, silicone and mixed-material options. Depending on the model, collectors can compare distinctive hairstyles, removable clothing, carefully shaped body proportions and character-focused facial styling.
Browse the LORIBEAR collection to compare the available characters, materials, sizes and designs and find the model that best matches your preferred character style and collecting needs.