Gundam Gunpla Kits: Grades, Tools and Building Guide

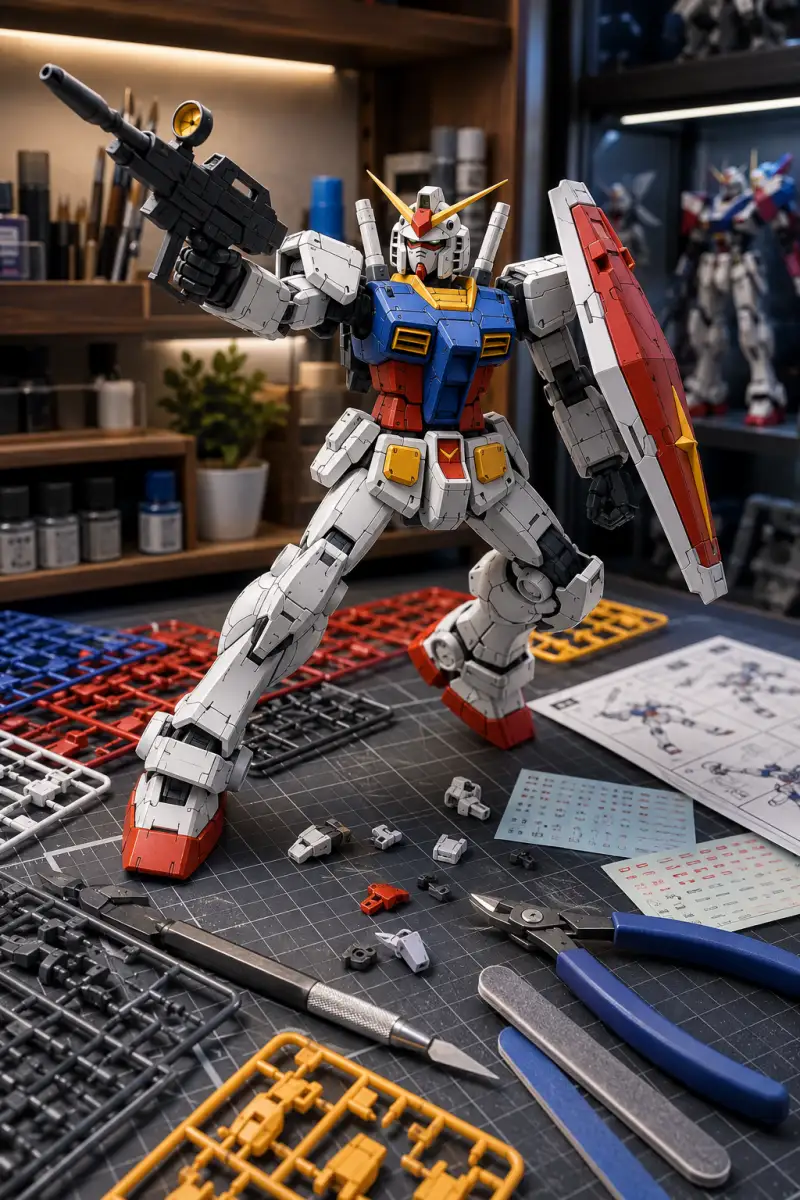
Gundam Gunpla kits are plastic model kits based on mobile suits and machines from the Gundam franchise. “Gunpla” is the established name for Gundam plastic models produced by Bandai Spirits, and building the model forms an important part of the collecting experience. Instead of opening a box and receiving a finished display piece, the builder removes parts from moulded runners, assembles the structure and then decides how much additional detailing to add.
Gunpla therefore differs from a finished Gundam figurine. Depending on the kit, the builder may stop after basic snap-fit assembly or continue with panel lining, decals, small colour corrections, weathering and a final surface coat. Bandai’s product range includes Entry Grade, High Grade, Real Grade, Master Grade, Full Mechanics and Super Deformed formats, while wider figure formats are organised in the anime figures and collectibles reference.
| Label | What the buyer should verify |
|---|---|
| Entry Grade | Parts count, tool requirements, colour separation and included accessories. |
| High Grade (HG) | Series, stated scale, articulation, accessories and whether a display base is included. |
| Real Grade (RG) | Small-part complexity, frame design, decals, articulation and build experience required. |
| Master Grade (MG) | Stated scale, inner-frame features, finished dimensions, accessories and display space. |
| Full Mechanics | Finished size, internal structure, armour separation and complexity compared with other large kits. |
| Super Deformed | Stylised proportions, compact dimensions, articulation and included weapon or effect parts. |
Understanding Gunpla grade and scale
A Gunpla grade identifies a Bandai product line rather than a universal quality score. Therefore, two kits within the same grade can still differ significantly in engineering, articulation, parts count and assembly experience.
For example, an older High Grade kit may use simpler joints and fewer colour-separated parts than a more recent release. Likewise, one Real Grade can feel very different from another because Bandai changes engineering approaches between generations and individual mobile suit designs.
Scale provides another piece of information. A stated scale describes the relationship between the model and the fictional full-size mobile suit, while non-scale and stylised products do not claim the same proportional relationship.
However, scale alone does not determine finished height. Antennas, wings, backpacks, shields and large weapons can make two models with a similar scale occupy very different amounts of shelf space.
Read the box before choosing a kit
The box normally identifies the official product name, series, grade and scale where applicable. Therefore, buyers comparing Gunpla model kits should start with the printed product information instead of judging a model only from photographs.
Promotional images can also show a kit after panel lining, painting or decal application. As a result, the finished promotional example may look more detailed than a basic straight build.
Before purchasing, check the exact release name as well. Gundam designs often receive multiple versions, colour variants, special editions and updated moulds, so a similar-looking box does not always contain the same kit.
What comes inside a Gunpla box?
A typical kit contains moulded plastic runners, an instruction manual and stickers or decals when the release includes them. In addition, some models include interchangeable hands, weapons, effect parts, beam pieces or alternative armour components.
Display bases vary by release. Therefore, never assume that the action base shown in a promotional photograph comes inside the box unless the product description or manual confirms it.
Runner colours can also indicate how much visual separation the model provides without paint. Modern kits often divide armour, frame and accent colours across several runners, which lets builders achieve a recognisable appearance immediately after assembly.
Before opening every runner bag, compare the runner letters with the manual. This simple check makes it easier to confirm the contents and identify the correct parts during construction.
Runner maps and unused parts
The instruction manual normally includes a runner map near the beginning. This diagram shows each runner and can also indicate pieces that the finished model does not use.
Therefore, an unused part does not automatically mean that you missed a step. Bandai sometimes shares runners between related kits, which can leave spare pieces in the box.
However, keep those extra parts until the build is complete. Some small components look very similar, and discarding a piece too early can create unnecessary confusion later.
Essential tools for a first Gunpla build
Purpose-made plastic nippers provide the most useful starting tool. They allow the builder to cut a part away from the runner without twisting the plastic and placing unnecessary stress on thin components.
In addition, a hobby knife, sanding stick or fine abrasive tool can help remove the remaining gate mark after the initial cut. Beginners should work slowly because aggressive trimming can remove part of the actual armour surface.
A cutting mat also provides a more stable work area. Meanwhile, small tweezers can help with stickers and tiny decals that become difficult to position with fingers.
More advanced builders may add panel-line tools, decal solutions, files, polishing materials, paint and top coat later. However, a first kit does not require a large tool collection.
How to remove parts from the runner
Do not twist the part directly from the runner. Instead, make the first cut slightly away from the finished surface and leave a small amount of gate material attached.
Next, make a second controlled cut closer to the part. This two-step method reduces stress marks and lowers the risk of gouging the visible surface.
Afterwards, use a suitable trimming or sanding method to refine the remaining nub. On darker plastic, aggressive cutting can create a pale stress mark, so careful pressure matters.
Thin antennas and narrow decorative pieces need even more caution. Therefore, support the part close to the cutting point rather than holding it from the opposite end.
Removing nub and gate marks
A straight build can look much cleaner when the builder spends time on the gate marks. For example, a visible nub on the shoulder armour or shield can distract from otherwise good colour separation.
Start by removing excess plastic with controlled cuts. Then use fine sanding or polishing when necessary to blend the area into the surrounding surface.
However, sanding changes the surface texture. Therefore, avoid using a coarse abrasive over a large visible area unless you plan to restore the finish afterwards.
Builders who plan to paint the model have more freedom because primer and paint can hide small variations in surface finish.
Snap-fit assembly and part orientation
Many modern Gunpla kits use snap-fit construction, so the parts lock together without glue during normal assembly. Nevertheless, correct orientation remains important.
Before pressing two pieces firmly together, compare the pegs, slots and diagram in the manual. If a part requires unusual force, stop and check the orientation rather than pushing harder.
Forcing the wrong connection can bend a peg, create a white stress mark or make later disassembly difficult. Therefore, a tight fit deserves inspection rather than additional pressure.
Small frame components can also look nearly identical from opposite sides. Taking a few extra seconds to match the manual usually saves much more time later.
A practical assembly sequence
- Read the manual and identify every runner by its letter code.
- Prepare only the runners required for the current section.
- Remove each part with controlled cuts instead of twisting it free.
- Clean obvious gate residue before final assembly.
- Check every joint and connection orientation before pressing parts together.
- Complete one major section before moving to the next.
- Test articulation carefully after each limb or body section is assembled.
- Add stickers, decals, panel lining or optional finishing after the basic fit is confirmed.
Many manuals divide the model into head, torso, arms, waist, legs and backpack sections. Following that order keeps loose parts under control and makes mistakes easier to identify.
Choosing a first Gunpla kit
A good first kit should match the builder’s patience, dexterity and interest in the mobile suit rather than simply carrying the lowest grade label. Enjoying the design can make the assembly process much more satisfying.
Lower parts counts generally reduce the number of small components to manage. However, the individual kit still matters because different releases within one product line can vary substantially.
For a first build, clear instructions, strong colour separation and straightforward articulation can be more valuable than an extremely complicated internal frame.
Bandai’s official UK Gunpla catalogue provides current category labels and product information. Its official account of 40 years of Gunpla also covers kit selection and basic tools.
High Grade and Entry Grade for simpler builds
Entry Grade and many High Grade releases can suit builders who want a shorter path from opening the box to completing a displayable mobile suit.
However, “simpler” does not mean visually uninteresting. Good colour separation, expressive proportions and modern articulation can still create a strong shelf display without hundreds of pieces.
High Grade also offers a wide variety of mobile suits. Therefore, collectors who want several machines from one series often find the format practical for building a larger display.
Real Grade and small-part complexity
Real Grade kits aim to provide dense mechanical detail within a relatively compact model. As a result, they can contain smaller armour sections, layered components and more detailed decals.
This approach creates impressive visual density, but it also requires more careful part handling. Tiny pieces can disappear easily, and narrow sections may need slower cleanup.
Therefore, builders who choose Real Grade should prepare a clean workspace and keep loose components organised during assembly.
Master Grade and larger display presence
Master Grade kits usually provide a larger building experience, which gives the design more room for internal structure, armour separation and mechanical detail.
The larger size can also make some components easier to handle than tiny parts on smaller kits. However, the overall parts count and construction process may take considerably longer.
In addition, the finished model needs more shelf space. Large weapons, backpacks and wings can increase the required width and depth beyond the basic body dimensions.
Panel lining brings out mechanical detail
Many Gunpla surfaces include recessed lines and moulded mechanical details. Panel lining can make those details more visible by creating contrast inside the grooves.
For example, subtle dark lines around armour panels can separate white or light-coloured sections without repainting the entire model.
However, builders should choose products that suit the plastic and finishing method they use. Excess liquid around joints, cracks or stressed areas can create problems with some materials.
Therefore, read the product instructions and test unfamiliar materials on spare runner plastic first.
Stickers, decals and markings
Stickers provide a quick way to add symbols, colour corrections and warning marks. Before applying one, clean the surface and use tweezers when the piece is too small for accurate finger placement.
Decals require more patience but can produce a thinner and more integrated appearance. Water-slide decals, when included or purchased separately, need careful positioning and drying.
In addition, builders should decide whether they want every available warning mark. A heavily marked military-style finish creates a very different appearance from a clean anime-inspired build.
Painting and colour correction
Painting remains optional for many modern Gunpla kits because the moulded plastic already separates the major colours. Nevertheless, paint allows builders to customise shades, correct small colour details and create unique finishes.
Beginners can start with limited details rather than repainting the entire model. For example, small vents, sensors or weapon sections can provide useful practice.
Whenever you use paint, primer, thinner or coating products, follow their safety instructions and provide appropriate ventilation.
In addition, test unfamiliar products on spare runner plastic before applying them to a completed model.
Top coating and final surface appearance
A final coating can change how the completed model reflects light. Matte finishes can reduce the toy-like shine of raw plastic, while gloss and semi-gloss finishes create different visual effects.
However, coating can also affect clear parts, metallic finishes, joints and some decals. Therefore, masking or partial disassembly may become necessary depending on the desired result.
For a first build, top coating remains optional. Good gate cleanup and careful assembly can already produce a satisfying display model.
Articulation and joint care
Gunpla joints allow the finished model to recreate standing, flying and combat poses. However, articulation does not mean every joint should move to its absolute limit.
When posing the kit, hold the limb close to the joint instead of pulling from the hand, foot or weapon. This reduces leverage on small connection points.
If a joint suddenly resists movement, stop and inspect it. Forcing a stuck shoulder, wrist or hip can damage an internal peg.
In addition, large backpacks or weapons can change the model’s balance, so a compatible action base may provide better support for dynamic poses.
Weapons, hands and optional accessories
Many kits include rifles, beam sabres, shields or interchangeable hands. Some releases add effect parts or alternative equipment, while others keep the accessory list relatively simple.
Therefore, check the official contents before purchasing. Promotional artwork may show equipment from a related release or optional accessory set.
Unused hands and weapon parts are easy to lose. A small labelled container keeps them associated with the correct model and makes future pose changes much easier.
Display bases and dynamic posing
A standing Gunpla can often balance without a separate base, but flying and action poses usually benefit from additional support.
Before buying a stand, confirm compatibility with the kit. Different products use different adapters, peg sizes and connection points.
A stable action base can also reduce stress on ankles and backpack-heavy designs. As a result, the model can hold a more dramatic pose without relying entirely on the leg joints.
Authenticity and official packaging
Official packaging should identify Bandai Spirits, the product line, model name and licensing information. Therefore, compare unfamiliar listings with official catalogue photographs when authenticity raises concern.
Print quality, logos, product codes and runner packaging provide useful reference points. In addition, a trustworthy seller should clearly identify the exact kit rather than relying on a generic “Gundam model” title.
An unusually low price, missing manufacturer information or packaging that differs significantly from official images deserves further checking.
However, packaging can change between regions or production runs, so one small difference does not prove that a kit is counterfeit.
Gunpla UK availability and preorders
Availability varies between markets and production runs. Therefore, a Gunpla UK listing should clearly state whether the kit is currently in stock, available for preorder or arriving through an imported release.
Before placing a preorder, check the expected release window, payment timing and cancellation policy. In addition, save the exact product name because similar mobile suits may have several releases available at the same time.
Older kits can also return through later production runs, so a temporarily unavailable product does not necessarily remain discontinued permanently.
Buying opened or second-hand Gunpla
An opened kit requires more checking than a sealed product. First, confirm that the manual and all required runners remain present.
If the previous owner started construction, inspect how they removed parts from the runners. Deep cutting marks or damaged pegs can affect later assembly.
Completed second-hand models require another level of inspection. Check joints, antennas, weapon handles, hands and backpack connectors for damage.
In addition, ask whether the seller used glue, paint or permanent modifications because those changes can affect future disassembly and customisation.
Display and shelf planning
A completed Gunpla needs more room than its body height suggests. Rifles, shields, wings and backpacks can extend far beyond the torso.
Therefore, measure shelf width and depth as well as vertical clearance. A model posed with both arms extended may require considerably more space than the same kit in a neutral standing pose.
For several models, risers can help create different display levels. Meanwhile, leaving some empty space between kits prevents weapons and antennas from touching neighbouring models.
Cleaning a completed Gunpla
Loose dust can collect inside panel lines, around joints and beneath backpacks. A soft brush provides a simple way to remove it without placing heavy pressure on the model.
Support antennas, fins and narrow accessories while cleaning. In addition, avoid grabbing the model by a weapon or extended part when moving it from the shelf.
Household solvents and aggressive cleaners can damage paint, decals or plastic. Therefore, use only materials that suit the finish applied to the model.
Protecting Gunpla from sunlight and heat
Strong sunlight can change the appearance of coloured plastic, painted surfaces and decals over long periods. Therefore, avoid placing a permanent display directly beside a bright window.
Heat can also affect plastic and joints. Large or unevenly balanced models may gradually lean when a joint carries continuous load.
Changing the pose occasionally and using a stand where appropriate can reduce unnecessary stress on the model.
Storing spare parts and manuals
Unused hands, weapons, adapters, decals and spare pieces are easiest to manage when you store them together. Labelled bags or divided containers prevent parts from different kits becoming mixed.
Keep the instruction manual as well. It provides the runner map, assembly order and part numbers that can become useful during repairs or later customisation.
Original boxes occupy considerable space, but they also provide an easy way to keep a kit’s manual, spare runners and accessories associated with the correct model.
Gunpla buying checklist
- Confirm the exact mobile suit and release version.
- Check the official grade and scale where applicable.
- Compare finished dimensions with available shelf space.
- Review the runner count and expected build complexity.
- Check whether weapons, effect parts and display bases are included.
- Confirm whether the kit uses stickers, decals or optional markings.
- Prepare suitable nippers and basic cleanup tools.
- Check product compatibility before using paint, panel lining or coatings.
- Review official packaging and product codes when authenticity matters.
- Check preorder and delivery terms for UK listings.
- Inspect runner completeness when buying opened kits.
- Keep spare hands, weapons, decals and manuals organised after assembly.
Frequently Asked Questions
Does Gunpla require glue?
Many current Bandai kits use snap-fit construction, so basic assembly often does not require glue. However, custom modifications or repairs may use adhesive, so follow the requirements of the exact project rather than assuming every build works the same way.
Are all High Grade kits 1/144 scale?
Many High Grade releases use 1/144 scale, but grade and scale describe different aspects of the product. Therefore, always check the individual box and official specification instead of assuming scale from the HG label alone.
Is painting necessary?
No. Modern colour-separated parts allow many kits to look complete without full painting. However, panel lining, detail painting and top coating can change the final appearance when the builder wants additional customisation.
What is the difference between Gunpla and Gundam figures?
Gunpla requires the buyer to assemble the model from parts supplied on runners. By contrast, a finished Gundam figure or statue arrives substantially complete, although it may still include movable joints or interchangeable accessories.
Which Gunpla grade is best for beginners?
No single grade fits every beginner. Entry Grade and many High Grade kits can provide straightforward starting points, but interest in the mobile suit, parts count and individual kit engineering matter as well.
Should I keep unused runner parts?
Yes, at least until the build is complete. Some runners contain unused pieces, while others hold small parts that are easy to overlook. Afterwards, labelled storage can keep useful spare components organised.
Related model, statue and display topics can be found in the Collector Guides directory. In addition, gift selection is covered in the anime gifts reference.
Explore Anime-Inspired Sex Dolls at LORIBEAR
If your interest in character collecting extends beyond model building, LORIBEAR offers a very different kind of anime-inspired collectible. Visit the LORIBEAR shop to explore our current anime-inspired sex dolls, featuring detailed character faces, silicone body designs, realistic proportions and removable costumes.
Explore the current LORIBEAR collection and find the anime character sex doll, body style and design that you want to add to your private collection.