Blythe Doll Customizing: Plan the Face Before You Carve

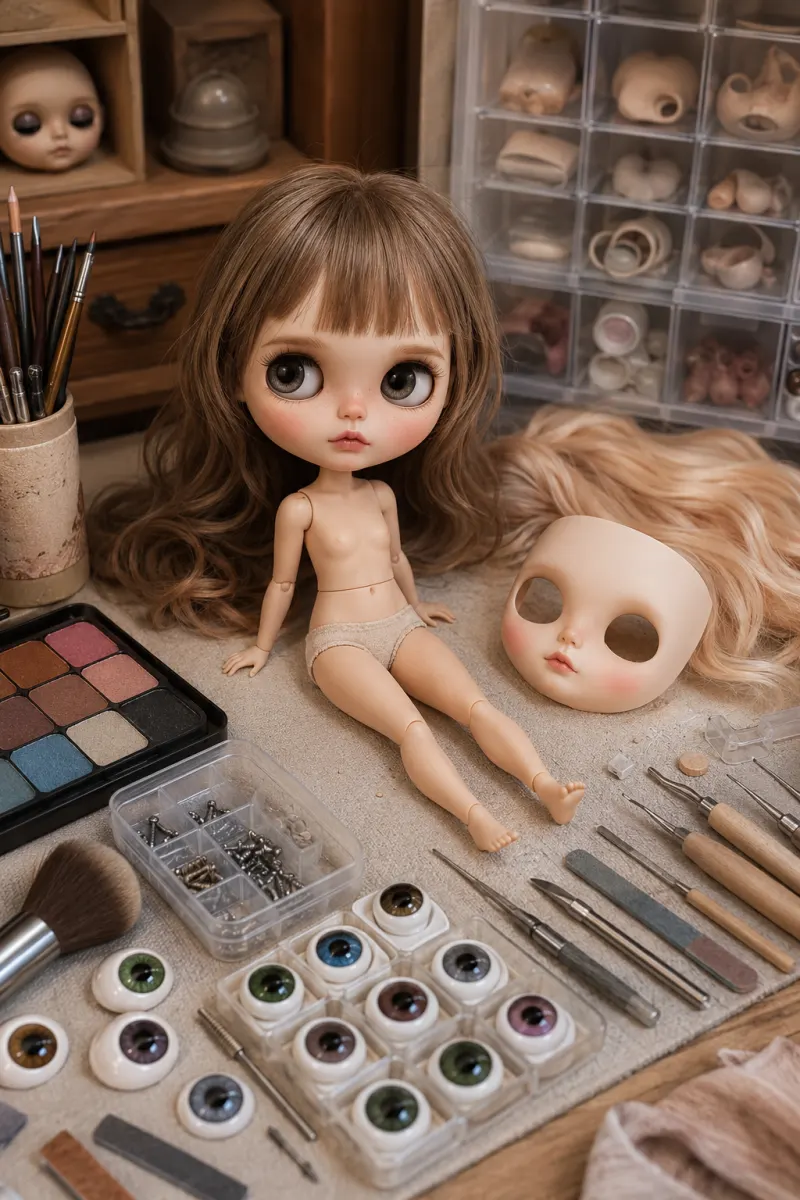
Blythe doll customizing transforms a factory-made doll through deliberate changes to the faceplate, eyes, makeup, hair, clothing and accessories. The most convincing customs rarely begin with carving. Instead, they begin with a clear character brief that defines the intended age impression, expression, colour palette, hairstyle and the features that should remain recognisably Blythe.
Blythe’s oversized head and large colour-changing eyes concentrate attention on a relatively small facial area. Therefore, even a subtle adjustment can change the entire personality of the doll. Slightly lifting the mouth corners can soften the expression, while uneven nostrils, over-sanded eyelids or mismatched brows can become visually dominant.
For that reason, every stage should support the same character concept. Planning before disassembly protects the original doll, reduces unnecessary permanent work and makes it easier to decide when the custom has already achieved enough.
Define the Character Before Choosing Tools
Begin by deciding who the finished doll should become. The goal may be a gentle portrait, a mature fashion character, a playful fantasy design, a miniature version of someone familiar or a heavily stylised artist doll.
Next, collect front, three-quarter and profile references. These views reveal different information, so one attractive reference image is rarely enough. A front view helps with eye and eyebrow balance, while the profile reveals the relationship between the nose, lips, chin and forehead.
Finally, identify several visual signals that need to remain consistent throughout the project. Hair colour, eyebrow direction, lip shape, eye-chip colour and clothing palette can all become part of the same identity.
Create a Simple Face Map
Before sanding or carving, mark the areas you intend to change. A face map can show the proposed eyebrow height, lip line, nostril shape, philtrum and any contour that needs softer or stronger definition.
This step makes the goal more specific. A vague instruction such as “make the face more realistic” does not explain what should actually change. Realism might mean softer lips, less factory shine, deeper nostril definition or more subtle colour transitions.
Therefore, describe the desired result through visible features rather than general adjectives.
Separate Reversible and Permanent Changes
Not every custom idea requires permanent modification. Wigs, eye chips, pull strings, clothing, shoes and accessories can often transform the doll while preserving the factory faceplate.
Carving, sanding, removing factory paint and some adhesive-based modifications create a much greater commitment. Therefore, test the character through reversible styling first when the final expression remains uncertain.
This staged approach also gives the owner natural stopping points. If a new wig, clothing and eye combination already produces the intended personality, permanent carving may add risk without adding enough visual benefit.
Photograph the Factory Doll Before Disassembly
Disassembly should begin with documentation. Photograph the doll from the front, both profiles, the back of the head and the scalp area before removing any part.
Then record screw locations, spring placement, eye-mechanism orientation and the route of the pull cord as the head opens. Close photographs become especially useful when several small components look similar after removal.
Keep these images with the project rather than relying on memory. A custom may take several days or weeks, and the original assembly sequence can become surprisingly difficult to reconstruct later.
Organise Every Small Part
Use labelled containers or divided trays for screws, springs, eye-mechanism components and decorative pieces. Keep left and right parts separate when their orientation matters.
In addition, avoid mixing components from several Blythe projects on the same work surface. One misplaced screw can interrupt the entire reassembly process.
A simple written inventory can also help. Record what was removed, where it came from and whether the piece remains original or has been replaced.
Open the Head Without Forcing the Shell
If a seam refuses to separate, stop and inspect the construction rather than applying more force. A hidden screw, clip or adhesive point may still hold the shell together.
The official Blythe official customization technique demonstrates why faceplate work requires careful opening of the head and deliberate handling of the eye mechanism.
However, exact construction can vary between releases. Therefore, instructions for one Blythe doll should not automatically be treated as universal for every model.
Inspect the Faceplate Before Removing Material
Once the faceplate is accessible, study the factory sculpt under neutral light. Look at the lips, nostrils, philtrum, eyelids and chin from several angles.
At this stage, decide which factory features already support the character. Customisation does not require replacing everything. Preserving a useful contour reduces work and helps the finished doll retain some of the original Blythe identity.
Mark only the areas that genuinely need modification before using carving or sanding tools.
Carve in Shallow Stages
Begin with the smallest change capable of producing the desired expression. Fine tools remove material quickly on a small face, so several light passes provide more control than one deep cut.
Work symmetrically. Make two or three small passes on one side, repeat the same work on the other, then stop and compare.
Side lighting helps reveal differences in depth. In addition, turning the faceplate upside down can expose asymmetry that the eye may overlook when viewing the face normally.
Do Not Judge the Mouth From the Front Alone
A carved mouth can appear balanced from the front while becoming uneven in profile. Therefore, inspect the lips from both sides throughout the process.
Small changes to the corners alter expression dramatically. Raising them can create a softer or happier appearance, while lowering or flattening them can make the same face look more reserved.
Work gradually around the philtrum and lip edges. Deepening one area too quickly can change the surrounding proportions before the overall mouth shape has been established.
Nose Work Requires Restraint
Nostril and nose carving can add depth, but it can also become one of the most obvious sources of imbalance.
Compare both nostrils frequently rather than finishing one side completely before beginning the other. In addition, inspect the nose in profile so the new depth remains consistent with the lips and chin.
The goal should be controlled definition rather than removing the maximum amount of material.
Protect Wall Thickness Around Carved Areas
Deep carving can weaken thin sections of the faceplate. Therefore, changes around the lips, nostrils and other recessed areas should remain conservative until the builder understands the available material thickness.
Once the intended form begins to appear, switch from aggressive removal to finer shaping. Continuing with a heavy tool after the main structure is complete can erase nearby contours unnecessarily.
Sanding Should Refine Rather Than Resculpt
Sanding removes tool marks and blends carved areas into the original surface. However, excessive sanding can flatten cheeks, eyelids and other subtle factory contours.
Move gradually toward finer abrasives rather than trying to achieve a polished surface immediately. Inspect the face under side lighting between stages because scratches that disappear under direct light may remain visible from another angle.
Curved areas also need extra care. A flat abrasive tool can accidentally create a flat spot on a rounded facial surface.
Check Symmetry From Several Viewing Angles
No face needs mathematical symmetry, but accidental imbalance can distract from the intended character.
Inspect the face straight on, then rotate it through both three-quarter views and both profiles. Finally, turn it upside down and repeat the comparison.
This process often reveals differences in lip depth, nostril height or eyelid shape that remain hidden when the face stays in one familiar orientation.
Dust Control Protects Both the Finish and the Maker
Carving and sanding create fine plastic dust. Do not allow it to spread across the room, into food or over parts that will later receive paint and sealant.
The UK Health and Safety Executive: controlling workshop dust explains why fine dust needs control at its source.
Use suitable extraction or compatible wet methods, keep food and drink away from the bench and use appropriate respiratory protection for the task.
Clean the Work Surface Between Stages
Plastic dust can settle inside eye mechanisms, on freshly prepared surfaces and beneath later colour layers. Therefore, clean the workspace after carving and sanding before beginning makeup.
Use separate tools or clean them thoroughly before moving from material removal to colour work. In addition, inspect the inside of the faceplate for loose particles before reassembly.
Prepare the Plastic Before Colour Work
Makeup adheres more reliably to a clean, appropriately prepared surface. Oils from hands, sanding residue and other contamination can interfere with later layers.
Liquitex: preparing plastic surfaces recommends cleaning contamination and preparing plastic appropriately before painting.
Test primers, pastels, pencils, paints and sealants on hidden or spare plastic whenever possible because products with similar names can use very different solvents or binders.
Build Colour as Transparent Structure
Natural-looking makeup usually develops through several light layers rather than one heavy opaque coat.
Start by establishing general skin warmth or subtle tonal variation. Then add eyebrows, lashes, lips and more specific details gradually.
This process gives the sculpt and colour a stronger relationship. Blush can reinforce cheeks, nose or other contours instead of appearing as an unrelated coloured patch on top of the plastic.
Eyebrows Change the Expression Quickly
Eyebrow height, angle and thickness can make the same carved face appear gentle, curious, serious or mature.
Therefore, plan both eyebrows together. Complete a small amount of work on one side, then immediately compare it with the other.
A perfectly mirrored pair is not essential, but both brows should support the same emotional direction.
Work on Both Eyes as One Composition
Eye makeup and lashes should be evaluated together rather than finishing one side before touching the other.
Small differences in line thickness or angle can become very noticeable because the Blythe face draws so much attention toward the eyes.
Step back from magnification frequently. Details that look balanced at very close range may create a different expression when the complete face is viewed normally.
Lips Need Gradual Colour
Lip colour can easily dominate a small face. Therefore, build it slowly and compare the result with the brows, eyes and intended character palette.
A softer character may benefit from subtle colour transitions, while a stronger fashion concept can support more contrast.
Selective gloss can add depth after the colour has settled, but the gloss should support the design rather than cover the entire surrounding surface.
Use Different Finishes for Different Areas
Skin, lips and eyes do not need the same surface finish. Controlled low shine can preserve facial sculpting, while lips and eyes may benefit from selective gloss.
However, heavy sealant can cloud fine colour, trap dust or alter the appearance of earlier layers. Therefore, allow each stage to dry or cure according to the product instructions before adding another.
Avoid Rushing the Sealant Stage
Sealant protects colour, but it should not become a way to hide unfinished surface preparation.
Inspect the face for dust, uneven colour and remaining sanding marks before sealing. Once several layers sit on top, correcting the underlying problem can become much more difficult.
Eye Chips Can Change the Character Without Carving
Eye-chip colour, reflectivity and pattern can transform a Blythe doll while leaving the faceplate untouched.
Therefore, test several options early in the project when possible. A new eye combination may already create enough character difference to reduce the amount of permanent face work required.
Assess chips under the lighting where the doll will normally be displayed. Dark chips may lose iris detail at a distance, while highly reflective chips can become dominated by glare.
Check Eye Alignment Before Closing the Head
After changing chips or working around the mechanism, rotate through every eye position before final reassembly.
Confirm that both eyes move freely and that the gaze remains balanced. In addition, check that nothing rubs against the inside of the faceplate.
Fixing a minor alignment issue is much easier before every screw and hair component returns to place.
Test Eyelid Closure and Pull-Cord Return
The eye mechanism should operate smoothly after custom work. Therefore, test the eyelids, eye rotation and pull-cord return several times before sealing the head.
If movement feels different from the original mechanism, stop and inspect the assembly rather than forcing the cord repeatedly.
Keep Adhesives Away From Moving Components
Adhesive can interfere with eye mechanisms, painted surfaces and later repairs. Therefore, use only the amount required for the intended component and keep it away from moving parts.
When testing a new adhesive, confirm both material compatibility and curing behaviour before applying it near finished makeup.
Hair Can Transform the Doll More Than Small Facial Changes
Hair controls the silhouette around the oversized Blythe head. As a result, colour, length, density and fringe shape can change the apparent facial proportions dramatically.
Therefore, hairstyle should be planned alongside the face rather than treated as the final decorative stage.
A wide, voluminous style can make the face appear smaller, while a tighter style can expose more of the jaw and cheek contours.
Try a Wig Before Committing to Permanent Hair Work
A removable wig offers a reversible way to test a different colour, texture or hairstyle.
This becomes especially useful when the owner has not decided whether to alter the original scalp permanently.
Photograph several wig options with the completed face before choosing the final direction.
Rerooting Changes the Silhouette Permanently
Rerooting offers greater control over fibre colour, density and parting, but it requires careful planning around the scalp edge.
Distribute hair evenly rather than concentrating too much fibre in one section. Excessive density can make the hairstyle difficult to control and may affect the way the scalp fits.
Trim Hair Gradually
Hair that remains slightly too long can always be shortened. Hair cut above the intended line cannot be restored without replacing it.
Therefore, trim in small stages and check the silhouette from the front, side and back between cuts.
Fringes deserve particular caution because small changes around the eyebrows and eyes can alter the entire expression.
Choose Fibre Density to Support the Character
More hair is not automatically better. A dense reroot can overwhelm a gentle face, while insufficient density can reveal the scalp in unintended areas.
Therefore, choose density according to the hairstyle rather than maximising the amount of fibre.
Clothing Should Continue the Same Character Brief
Once the face and hair establish identity, clothing should reinforce the same visual idea.
A mature fashion custom may use a controlled palette and tailored garments, while a playful character may suit softer colour and more decorative styling.
The clothing does not need to be elaborate. One strong outfit that matches the face can create more identity than several unrelated pieces.
Fabric Scale Matters
Heavy seams, oversized prints and bulky hardware can overwhelm a small doll. Therefore, fine fabrics and low-bulk construction usually create more convincing clothing.
When a real garment inspires the design, simplify details that cannot translate naturally to doll scale while preserving the recognisable colours and silhouette.
Fastenings Should Remain Practical
Miniature zips and buttons can look realistic, but they also add bulk. Hidden snaps, fine hooks or carefully placed hook-and-loop closures may provide cleaner fit on small garments.
Keep rough fasteners away from finished hair and painted areas during dressing.
Test Dark Clothing Before Long Display
Dark and strongly dyed fabric can transfer colour to some doll materials. Therefore, clean new garments where appropriate and test them for a shorter period before leaving them on the doll permanently.
Inspect high-contact areas such as shoulders, waist and legs after removal.
Props Should Explain the Character
Accessories work best when they add information rather than clutter. Glasses, books, jewellery, a bag or another distinctive object can make the character more specific.
Choose a few meaningful props instead of surrounding the doll with objects that do not connect with the design brief.
Plan the Final Photographs Before Permanent Work
Photography often reveals whether the custom concept actually needs more modification. Therefore, photograph the doll after reversible stages such as eye changes, wig selection and clothing.
Test the intended background, camera height and lighting. A face that seems plain on the workbench may become convincing once the correct styling and pose are in place.
If the character already reads clearly, additional carving may not improve the result.
Use Progress Photographs as Decision Points
Take photographs after each major stage. Start with the factory doll, then document disassembly, carving, sanding, colour, eyes, hair and clothing.
These images provide more than a record. They allow the owner to identify when the likeness becomes stronger or weaker.
If the design begins moving away from the original brief, return to the last successful stage before making another permanent change.
Neutral Lighting Makes Evaluation Easier
Strong coloured lighting can hide surface scratches, change skin tones and make makeup appear more saturated than it really is.
Therefore, use neutral lighting for technical inspection and progress records. Decorative lighting can come later when photographing the finished doll.
Use a Finishing Checklist Before Reassembly
- Inspect facial balance in front, profile and three-quarter views.
- Check the mouth and nostrils under side lighting.
- Confirm that sanding marks no longer dominate the surface.
- Inspect both eyebrows and eyes as one expression.
- Check for loose dust beneath eye chips and inside the faceplate.
- Test eye rotation through every position.
- Test eyelid closure and pull-cord return.
- Confirm that adhesives do not interfere with moving parts.
- Allow paint and sealant to cure according to their instructions.
- Test the final wig or scalp before closing the head permanently.
- Photograph the completed face under neutral lighting.
- Store the names of materials and colours used during the project.
Keep a Material Record for Future Repairs
Custom dolls can require touch-ups later. Therefore, save the names of paints, pencils, pastels, sealants, adhesives and fibres used in the project.
Include photographs of the finished colours under neutral lighting. This record makes later repairs more predictable than trying to recreate the original work from memory.
Protect Removed Factory Components
Original eyes, scalp pieces, clothing and other factory parts can remain useful even after the doll has changed completely.
Store them in labelled soft containers so painted surfaces and small parts do not rub together.
Keeping the original components also preserves more options if the owner later wants to revise or partially restore the custom.
Storage Should Protect Every Material
A finished Blythe custom can combine plastic, paint, sealant, synthetic hair, fabric, metal accessories and adhesives. Therefore, storage needs to consider the complete object.
Keep the doll away from prolonged direct sunlight and excessive heat. Avoid pressing the face, lashes or hairstyle against hard surfaces.
Alternate clothing and accessories should remain clean, dry and separated from delicate painted areas.
Customisation Does Not Need to End With One Finished Look
Reversible styling allows the same custom doll to continue changing after the permanent face work has finished.
New wigs, eye chips, clothing and props can create seasonal or character variations without repeatedly carving the same faceplate.
The Doll Customisation & Styling pillar connects face work with clothing, wigs, accessories and broader presentation choices.
Customising at a Larger Body Scale Uses Similar Principles
The basic idea of coherent customisation does not disappear when the body format changes. Face, hair, clothing, body design and accessories still need to support one visual identity.
However, larger bodies introduce additional material, handling and maintenance considerations. The custom sex dolls reference examines how those custom choices work when face, body construction, clothing and material become part of the same configuration.
When Customisation Moves Beyond One Faceplate
Some collectors want to develop several expressions or character identities without repeatedly altering the same original head. In that situation, a separate head provides another route for experimentation.
The LORIBEAR figure heads and accessories show how a separate head can become the centre of a new character presentation.
Related options appear in the Figure Heads & Accessories collection, allowing collectors to compare different facial designs and presentation components without treating one head as the only permanent identity.
Character Identity Should Guide Every Modification
Whether customising Blythe or another character-focused doll, the strongest results come from several details supporting the same identity.
Face, eyes, hair, clothing and accessories should reinforce one another. A technically difficult modification adds little value when it pulls the project away from the intended character.
Therefore, return to the original visual brief whenever the project becomes complicated.
Blythe Doll Customizing Checklist
- Define the intended character before buying tools.
- Collect front, profile and three-quarter reference images.
- Create a face map before carving or sanding.
- Separate reversible and permanent modifications.
- Photograph the factory doll before opening the head.
- Record screws, springs, eye-mechanism orientation and pull-cord routing.
- Store small parts in labelled containers.
- Never force a head seam that has not released correctly.
- Carve in shallow stages and compare both sides frequently.
- Inspect the mouth and nose in profile as well as from the front.
- Move gradually toward finer abrasives after the main form is established.
- Control plastic dust at the work area.
- Clean the faceplate before applying colour.
- Test unfamiliar paints, sealants and adhesives before using them on the finished face.
- Build makeup through light layers.
- Evaluate eye chips under normal display lighting.
- Test eye movement and eyelid closure before closing the head.
- Keep adhesives away from moving eye components.
- Test wigs before committing to permanent rerooting.
- Trim hair gradually.
- Choose clothing and props that support the character brief.
- Take progress photographs after every important stage.
- Record materials and colour names for future repairs.
- Store the finished custom away from prolonged direct sunlight and excessive heat.
Customising Questions
Should a first Blythe project include carving?
Not necessarily. Eye chips, wigs, clothing and accessories can establish a completely different character while keeping the factory faceplate largely reversible. Try those stages first when the desired expression remains uncertain.
Why does a carved mouth sometimes look uneven?
The face may have been judged mainly from the front. Side lighting, profile views, three-quarter views and frequent left-right comparison reveal differences in depth that remain hidden from one viewing angle.
Should both sides of the face be perfectly symmetrical?
No. Natural visual balance matters more than mathematical symmetry. However, accidental differences in lip height, nostril depth or eyebrow position can distract from the intended expression.
Can any clear spray be used as a sealant?
No. Solvent strength, surface finish and plastic compatibility vary. Test the complete material sequence on spare or hidden plastic before applying it to the finished faceplate.
Should the face be repainted before changing the hair?
Usually not. Hair can transform facial perception dramatically, so testing a new wig or hairstyle first may show that less permanent face work is necessary.
How can carving dust be controlled?
Keep dust local to the work area through suitable extraction or compatible wet methods, clean the bench between stages and use appropriate respiratory protection for the task.
How can eye chips change the character?
Colour, iris design and reflectivity can change the apparent mood of the face without modifying the plastic. Test eye options under the lighting where the doll will normally be displayed.
What should be checked before closing the head?
Test eye rotation, eyelid closure, pull-cord return and internal clearances. Also remove loose dust and confirm that paint, sealant and adhesives have cured as required.
Is a wig better than rerooting?
Neither option is universally better. A wig provides greater flexibility and easier replacement, while rerooting creates a more permanent integrated hairstyle.
Why should progress photographs be taken?
They show whether each change strengthens or weakens the character concept and provide a record of construction, materials and condition for future repairs.
Workshop References
- Blythe official customization technique
- UK Health and Safety Executive: controlling workshop dust
- Liquitex: preparing plastic surfaces
More routes through clothing, materials and character presentation are organised in the Collector Guides.
Explore Anime-Inspired Character Dolls at LORIBEAR
For collectors who also value facial identity, hairstyle, clothing and character-focused customisation, the LORIBEAR shop offers anime-inspired sex dolls built around recognisable character presentation and detailed visual design.
The current collection includes TPE, silicone and mixed-material configurations across different character-inspired products. Depending on the model, collectors can compare facial designs, wigs, removable clothing, body styling and other presentation options before deciding how much additional customisation they want to add.
Browse the LORIBEAR collection to compare the available characters, materials and designs and find the character-focused option that best matches your preferred styling and customisation direction.